
Saturday, November 12, 2011
Finished chalkboard window
Well, here it is - the finished "shabby" chalkboard window I was working on! I think it turned out decent for my first experience with chalk paint. After the paint dried, the brush strokes were still visible, so I think next time I would use spray paint. And the tape that was used to tape off the window frame pulled a small area of the chalk paint off of the window while I was removing it. So I used a razor blade to cut the edge before I pulled the tape off for the rest of the window. Despite these minor cosmetic flaws, the chalkboard is functional - and definitely "shabby"! :) I'm somewhat stalling on hanging it since we have our house for sale on the market. I'm hoping we will sell soon and move so I can hang it in the new house!

Sunday, November 6, 2011
Chalkboard Window
There are so many creative crafting ideas out there in blog-land! I've been finding lots of inspiration. I recently found a very neat idea at Saving 4 Six for a DIY chalkboard from a "shabby" window. It looks super easy and creative, so I thought I'd give it a whirl. I picked up this window for $15 at a local barn sale. I love it!
Instead of using spray paint chalkboard paint, I decided to try the brush-on paint. Not sure how it will turn out compared to the spray paint, but I'm going to give it a shot. My mom helped me with the project and with watching the kids. (Thanks, Mom!) At first, I tried to skip the part where you tape off the frame . . . I thought I would be REALLY careful. Yep, this didn't work. I only had a big, fat, foam brush to brush the paint on, and it just wasn't working very well. My mom helped clean up the frame and then taped off the rest of the window so it would be easier to paint. MUCH better!
The directions on the paint jar said to apply two coats, waiting one hour in between coats. After the first coat, I was a little nervous because I tried to blend the brush strokes as best I could, but could still see them. :( I guess this is why spray paint might have been better?
I'm going to let it dry for the recommended 24 hours and see how it looks . . . . I'll keep you posted! Keep your fingers crossed!
 |
 |
| One coat applied |
The directions on the paint jar said to apply two coats, waiting one hour in between coats. After the first coat, I was a little nervous because I tried to blend the brush strokes as best I could, but could still see them. :( I guess this is why spray paint might have been better?
I'm going to let it dry for the recommended 24 hours and see how it looks . . . . I'll keep you posted! Keep your fingers crossed!
Tuesday, November 1, 2011
Spaghetti Pie
It appears I have a pie theme going on? My previous post was all about mini apple pies. My new favorite dinner recipe lately is a dish my mom brought over a couple weeks ago. The kids, hubby, and I loved it and can't seem to get enough of it! And it's quick and easy - bonus!
Here's what you need:
6 oz. spaghetti
1/2 c. grated parmesan cheese
1 lb. ground beef (I used our recently acquired venison!)
1 c. cottage cheese
3 Tbsp. butter
1/2 c. chopped onion
1 (8 oz.) jar spaghetti sauce
1/2 block mozzarella cheese, cut into thick slices
Italian seasoning, to taste
salt, to taste
pepper, to taste
Cook the spaghetti until tender and drain. Stir butter into spaghetti. Add parmesan cheese and toss until mixed. Form spaghetti mixture into a crust in a dish.
Brown the ground beef and onion. (I actually used dried onion). Drain off excess fat. Stir in spaghetti sauce, italian seasoning, salt and pepper and heat. Spread the cottage cheese over the top of the spaghetti crust. Top with the meat mixture. Place the hunks of mozzarella on top. Bake, uncovered, at 350 degrees for 20 minutes.
Here's the proof that this meal was a crowd pleaser . . .
 |
| Oooey-gooey cheesy yummy-ness - Spaghetti Pie! |
Here's what you need:
6 oz. spaghetti
1/2 c. grated parmesan cheese
1 lb. ground beef (I used our recently acquired venison!)
1 c. cottage cheese
3 Tbsp. butter
1/2 c. chopped onion
1 (8 oz.) jar spaghetti sauce
1/2 block mozzarella cheese, cut into thick slices
Italian seasoning, to taste
salt, to taste
pepper, to taste
Cook the spaghetti until tender and drain. Stir butter into spaghetti. Add parmesan cheese and toss until mixed. Form spaghetti mixture into a crust in a dish.
Brown the ground beef and onion. (I actually used dried onion). Drain off excess fat. Stir in spaghetti sauce, italian seasoning, salt and pepper and heat. Spread the cottage cheese over the top of the spaghetti crust. Top with the meat mixture. Place the hunks of mozzarella on top. Bake, uncovered, at 350 degrees for 20 minutes.
Here's the proof that this meal was a crowd pleaser . . .
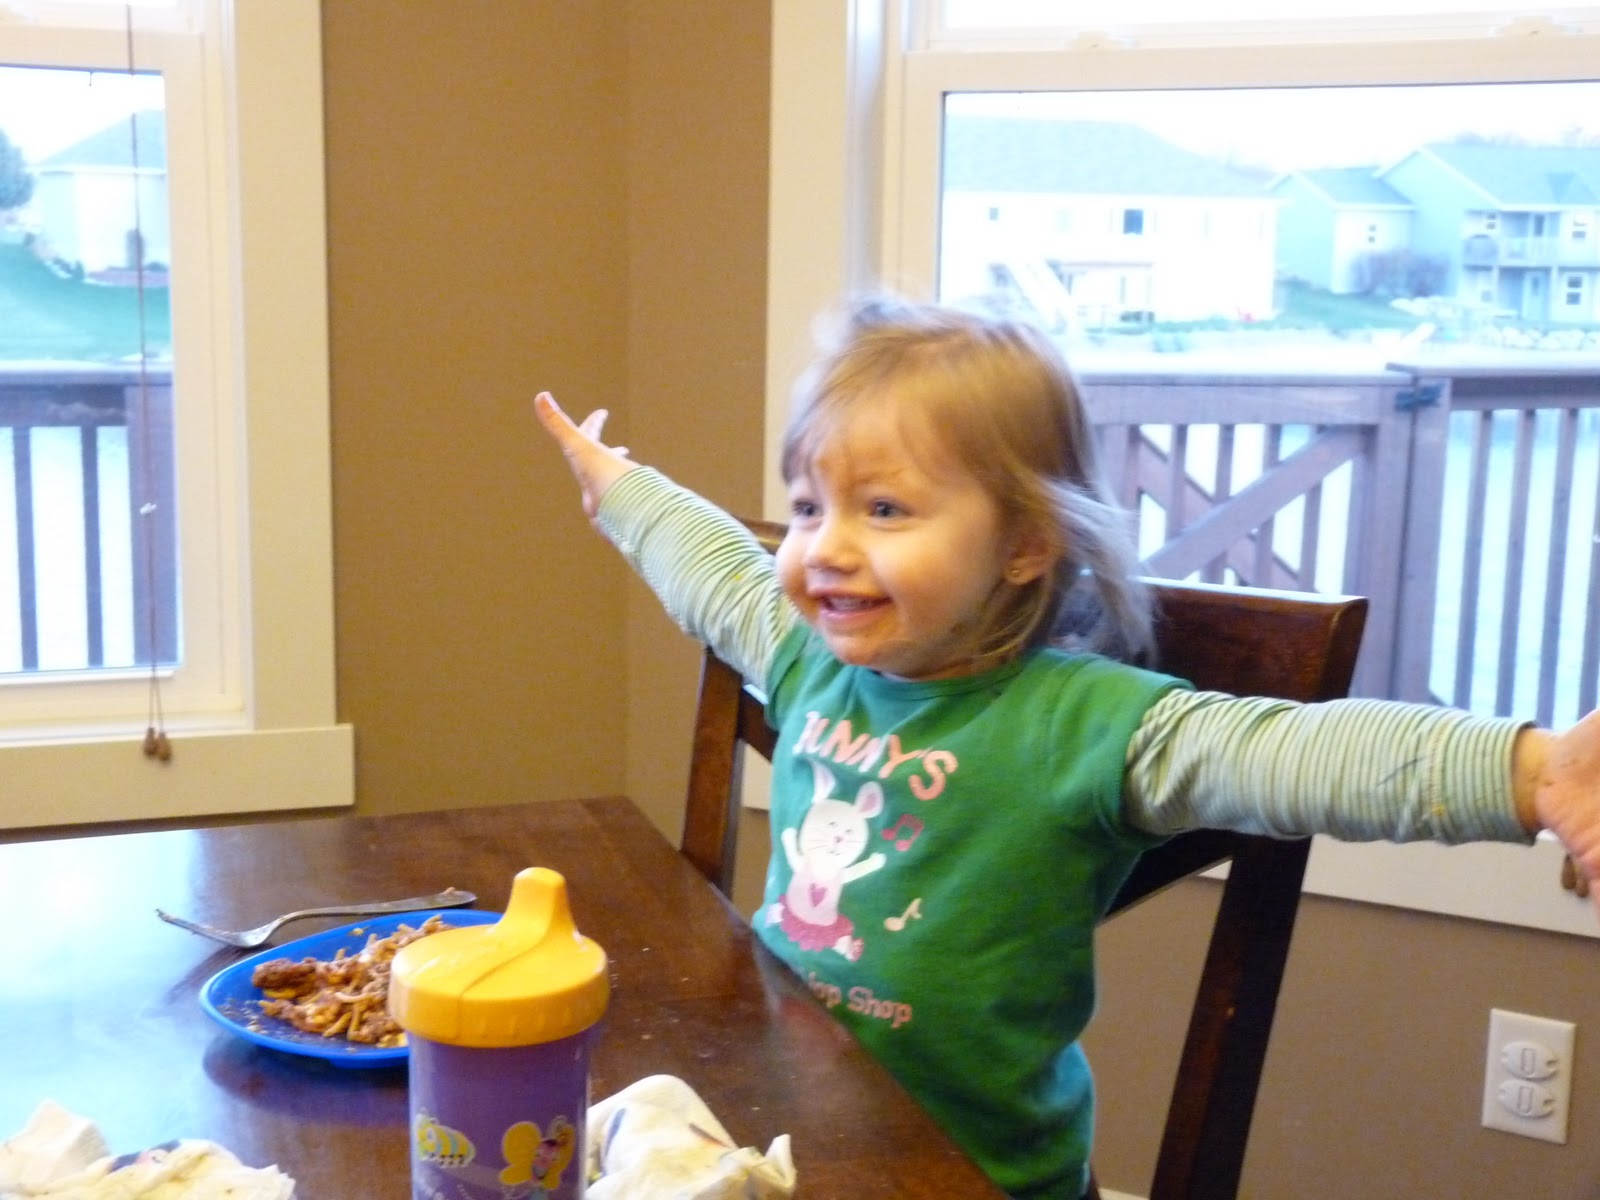 |
| Abby: "I love spaghetti!" |
 |
| Happy to have a full tummy and be messy - pure delight! . . . . . And then it was bath time :) |
Subscribe to:
Posts (Atom)