
Saturday, November 12, 2011
Finished chalkboard window
Well, here it is - the finished "shabby" chalkboard window I was working on! I think it turned out decent for my first experience with chalk paint. After the paint dried, the brush strokes were still visible, so I think next time I would use spray paint. And the tape that was used to tape off the window frame pulled a small area of the chalk paint off of the window while I was removing it. So I used a razor blade to cut the edge before I pulled the tape off for the rest of the window. Despite these minor cosmetic flaws, the chalkboard is functional - and definitely "shabby"! :) I'm somewhat stalling on hanging it since we have our house for sale on the market. I'm hoping we will sell soon and move so I can hang it in the new house!

Sunday, November 6, 2011
Chalkboard Window
There are so many creative crafting ideas out there in blog-land! I've been finding lots of inspiration. I recently found a very neat idea at Saving 4 Six for a DIY chalkboard from a "shabby" window. It looks super easy and creative, so I thought I'd give it a whirl. I picked up this window for $15 at a local barn sale. I love it!
Instead of using spray paint chalkboard paint, I decided to try the brush-on paint. Not sure how it will turn out compared to the spray paint, but I'm going to give it a shot. My mom helped me with the project and with watching the kids. (Thanks, Mom!) At first, I tried to skip the part where you tape off the frame . . . I thought I would be REALLY careful. Yep, this didn't work. I only had a big, fat, foam brush to brush the paint on, and it just wasn't working very well. My mom helped clean up the frame and then taped off the rest of the window so it would be easier to paint. MUCH better!
The directions on the paint jar said to apply two coats, waiting one hour in between coats. After the first coat, I was a little nervous because I tried to blend the brush strokes as best I could, but could still see them. :( I guess this is why spray paint might have been better?
I'm going to let it dry for the recommended 24 hours and see how it looks . . . . I'll keep you posted! Keep your fingers crossed!
 |
 |
| One coat applied |
The directions on the paint jar said to apply two coats, waiting one hour in between coats. After the first coat, I was a little nervous because I tried to blend the brush strokes as best I could, but could still see them. :( I guess this is why spray paint might have been better?
I'm going to let it dry for the recommended 24 hours and see how it looks . . . . I'll keep you posted! Keep your fingers crossed!
Tuesday, November 1, 2011
Spaghetti Pie
It appears I have a pie theme going on? My previous post was all about mini apple pies. My new favorite dinner recipe lately is a dish my mom brought over a couple weeks ago. The kids, hubby, and I loved it and can't seem to get enough of it! And it's quick and easy - bonus!
Here's what you need:
6 oz. spaghetti
1/2 c. grated parmesan cheese
1 lb. ground beef (I used our recently acquired venison!)
1 c. cottage cheese
3 Tbsp. butter
1/2 c. chopped onion
1 (8 oz.) jar spaghetti sauce
1/2 block mozzarella cheese, cut into thick slices
Italian seasoning, to taste
salt, to taste
pepper, to taste
Cook the spaghetti until tender and drain. Stir butter into spaghetti. Add parmesan cheese and toss until mixed. Form spaghetti mixture into a crust in a dish.
Brown the ground beef and onion. (I actually used dried onion). Drain off excess fat. Stir in spaghetti sauce, italian seasoning, salt and pepper and heat. Spread the cottage cheese over the top of the spaghetti crust. Top with the meat mixture. Place the hunks of mozzarella on top. Bake, uncovered, at 350 degrees for 20 minutes.
Here's the proof that this meal was a crowd pleaser . . .
 |
| Oooey-gooey cheesy yummy-ness - Spaghetti Pie! |
Here's what you need:
6 oz. spaghetti
1/2 c. grated parmesan cheese
1 lb. ground beef (I used our recently acquired venison!)
1 c. cottage cheese
3 Tbsp. butter
1/2 c. chopped onion
1 (8 oz.) jar spaghetti sauce
1/2 block mozzarella cheese, cut into thick slices
Italian seasoning, to taste
salt, to taste
pepper, to taste
Cook the spaghetti until tender and drain. Stir butter into spaghetti. Add parmesan cheese and toss until mixed. Form spaghetti mixture into a crust in a dish.
Brown the ground beef and onion. (I actually used dried onion). Drain off excess fat. Stir in spaghetti sauce, italian seasoning, salt and pepper and heat. Spread the cottage cheese over the top of the spaghetti crust. Top with the meat mixture. Place the hunks of mozzarella on top. Bake, uncovered, at 350 degrees for 20 minutes.
Here's the proof that this meal was a crowd pleaser . . .
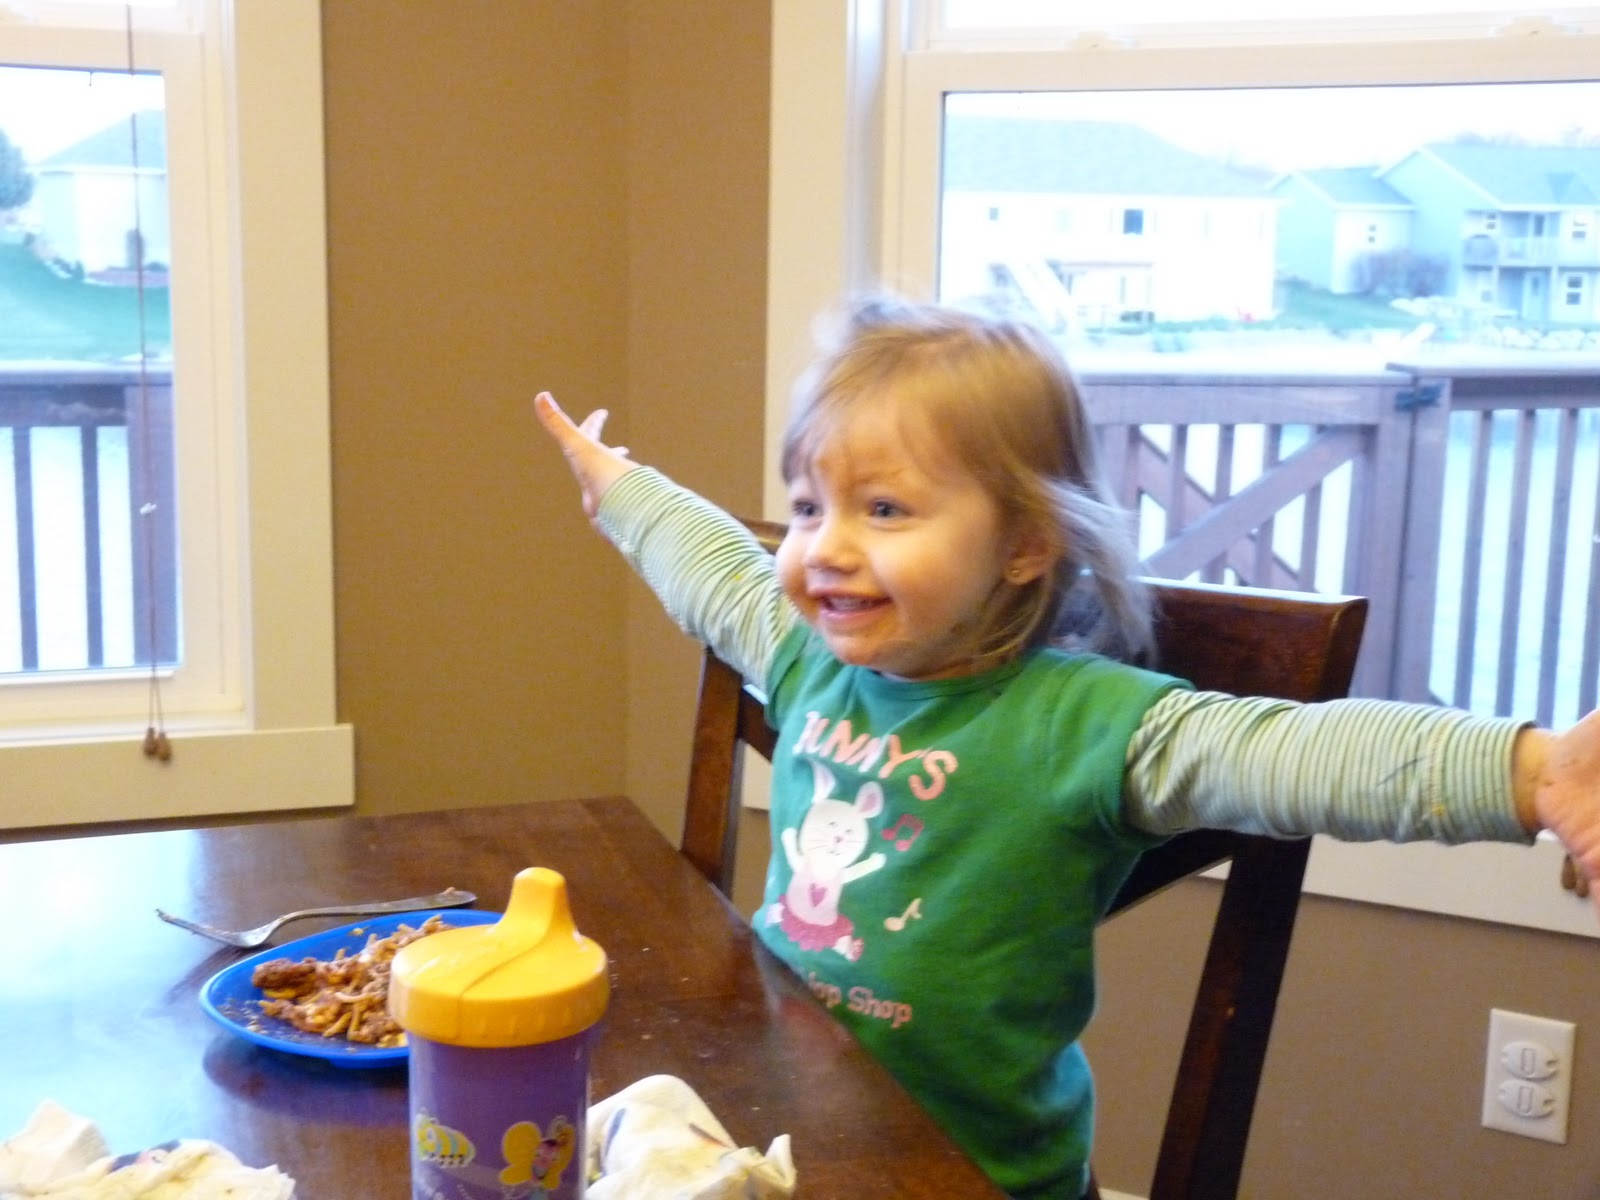 |
| Abby: "I love spaghetti!" |
 |
| Happy to have a full tummy and be messy - pure delight! . . . . . And then it was bath time :) |
Monday, October 31, 2011
Mini Apple Pies

Our family made a trip to the orchard this fall and I still had a huge bag of apples left over, even after my batch of applesauce and apple bread. I wanted to find something different to make with it and I found this amazing recipe for bite-size apple pies at the Lady with the Red Rocker. Did I mention I love bite size snacks? And I have to tell you that I was not disappointed!
 |
| This is all you need! |
2 tsp. cinnamon
1 pkg (2 crusts) refrigerated pie crust
3 tbsp. melted butter
2 medium apples, cut and peeled into 8 wedges (I used Jonathan apples)
Preheat the oven to 425 degrees. Mix the sugar and cinnamon in a bowl. Cut the pie crust into 8 strips. Coat each strip with melted butter and sprinkle with the cinnamon sugar mixture. Wrap each apple slice into the crust by rolling it up. I also coated my apple slices with the cinnamon sugar mix - you know, just to make sure they had enough :).
 |
| Getting all bundled up for the oven! |
Place each apple pie onto a baking sheet lined with parchment paper. Coat the tops with more melted butter and sprinkle with more cinnamon sugar mix. Bake for 10-13 min.
 |
| All lined up ready for baking! |
 |
| My little helper :) |
Here it is finished! A quick, easy and yummy little treat! I bet it would be perfect with a scoop of vanilla ice cream? And a cup of coffee?

HAPPY BAKING! ENJOY!
Tuesday, October 25, 2011
Easy Angel Costume
Last week, my sister-in-law asked if I'd have enough time to put together an angel costume for my sweet niece, Olivia. It couldn't be that hard, right? I was right! So super easy! The materials were provided by my SIL . . . she picked out white satin fabric (2 yds.) and silver sequin ribbon. Here's how I made it (minus the wings and halo):
First, I measured Olivia.
chest - 32"
length - 41" from shoulder to ankle
arm - 21" from shoulder to wrist
I unfolded the fabric and re-folded each side onto the center fold (this allowed me to use less fabric in order to have enough length). Using half of her chest measurement, I measured from the fold and cut two pieces (for the front and the back).

Then I cut the length.

I used a T-shirt as a guide for my pattern. I cut the width according to my measurements, allowing an extra inch or two for the seam. I wanted the costume to be a little big so she could wear warm clothes underneath for trick-or-treating :) My chest measurement was 32", so the front and back needed to be about 18" each. I took approximately half of that measurement and used 11" for my width for the pattern.

Using my arm length measurement, I used the T-shirt again as a guide for the sleeves.

I hemmed the neckline for the front and the back, then attached the two pieces together making a shoulder seam and the side seam with RIGHT sides together.

I attached the long side of the sleeves with RIGHT sides together.

To attach the sleeves onto the body, I found it easiest to turn the sleeve back to RIGHT SIDE OUT and slide the sleeve into the body (the body should still be INSIDE OUT). Line up the seam of the sleeve with the side seam of the body and pin. Pin the sleeve all the way around the arm hole and stitch.

After both sleeves are attached, I turned the whole costume right side out. I hemmed the sleeves and the bottom to finish the edges. To give it a little sparkle, I added the silver sequin ribbon around the neckline and the bottom of the sleeves. I've never sewn on sequins before, but I just stitched it right onto the fabric on each side of the ribbon - it was so much easier than I thought it would be!

And . . . voila! Nothing fancy, but sweet and simple!

I can't wait to see it with wings!
Saturday, October 15, 2011
I'm BAAACK!
Geez, it's been so long since I've written a blog, I had to give myself a tutorial for the website! What a busy summer! Lots has happened since my last blog for Evan's dedication, I don't know where to begin. The kids are getting so big - Evan will be 9 months on the 19th and is now crawling everywhere and pulling up standing next to, um, everything! And of course getting into all sorts of new trouble :)

Abby turned 2 years old on September 4, and started dance classes this year. She loves it! I was worried she would be too young, but she does so good!

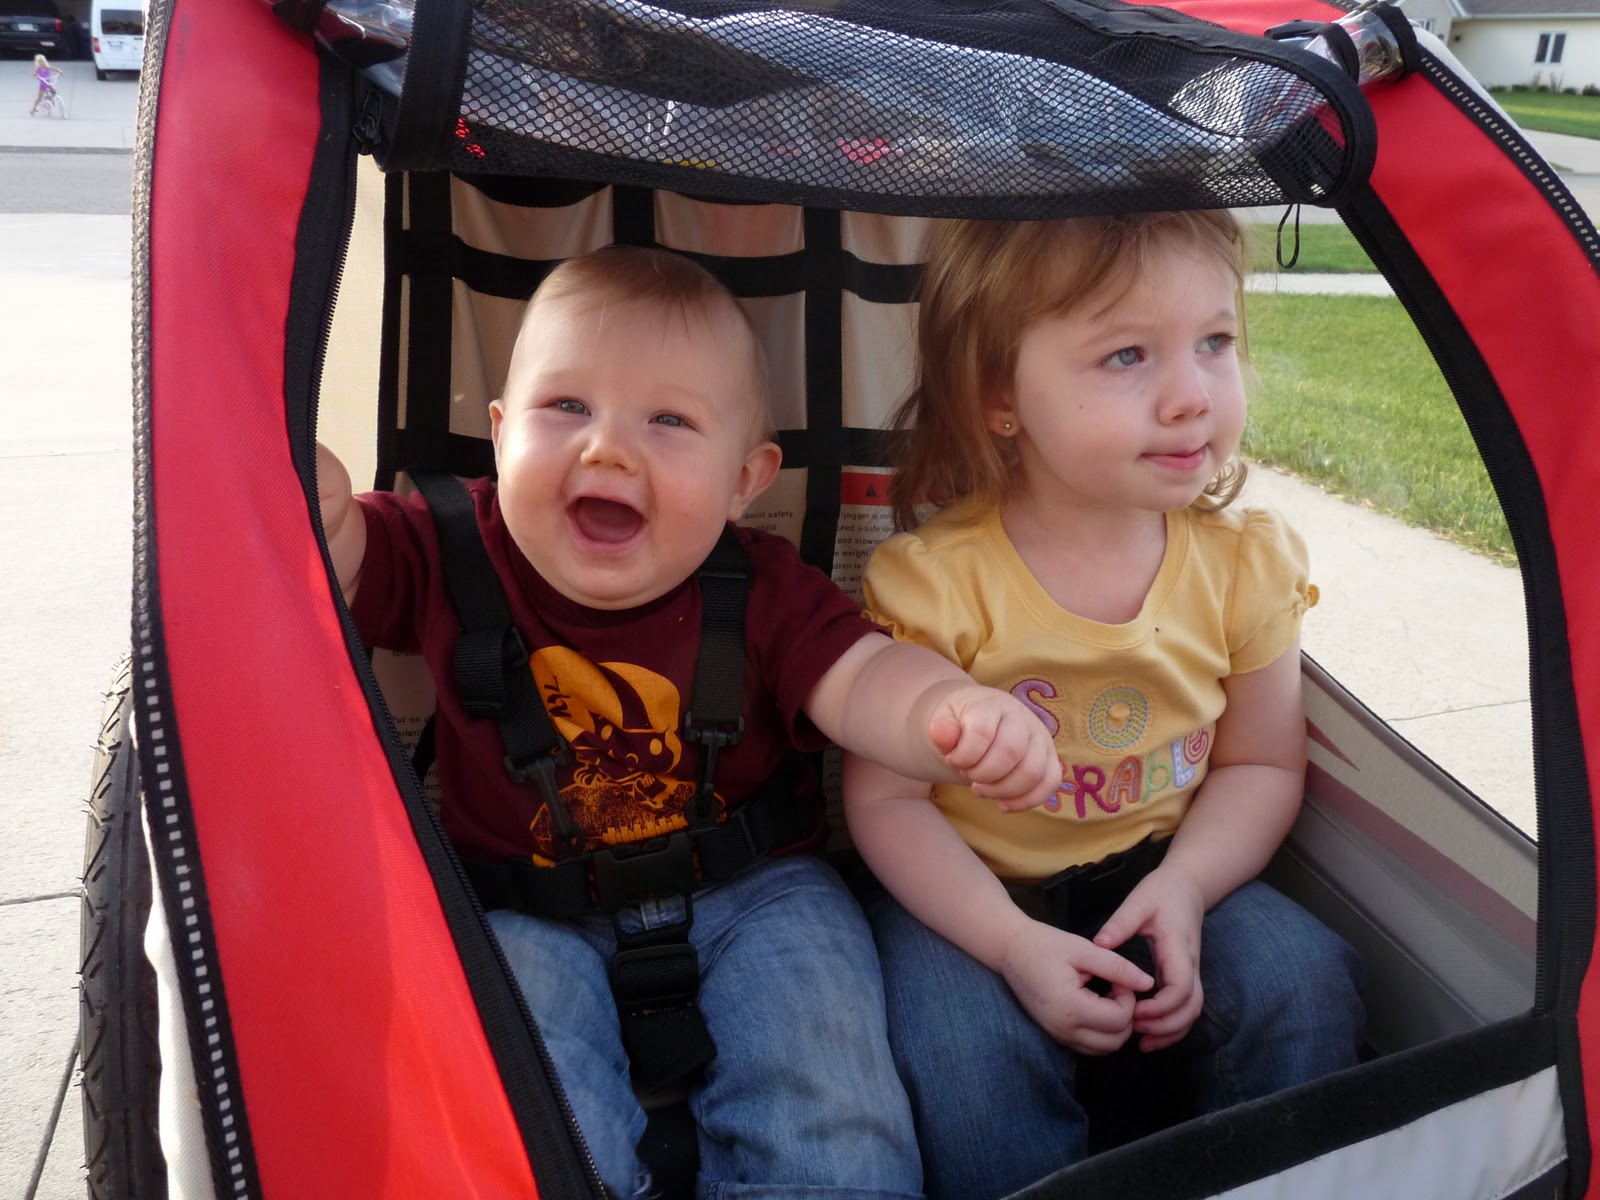
We had a great summer swimming and riding our bikes together. Jeremy and I both got new bikes and bought a pull-behind trailer for the kids. They have fun sitting next to each other riding on the trails and around the neighborhood.

We also took a vacation to Hocking Hills, OH late June. We had a great time with Jeremy's family, where most of us stayed in a huge log cabin that we rented. So nice! Jason and Julie stayed in a nearby campground with their 6 kids. It was so nice to spend that time together! We made a day trip to the Columbus Zoo, which the kids loved!
Jeremy's youngest brother, Jonathan, and his wife, Kelly, got married July 9th. A beautiful wedding in Holland on a scorching hot day! At least it didn't rain! Welcome to our family, Kelly! We are so blessed to call you a sister now!

A more sad event was the passing of my grandmother, Rosemary Zaskiewicz. She was 85 and had been in poor health the past few years. In and out of the hospital on a regular basis, we all knew she wouldn't live much longer. On September 27th, she passed peacefully at St. Mary's Hospital after a lethal diagnosis of pneumonia. It gives me peace to know that she is in a better place and no longer suffering.
We recently put our house on the market for sale, as well. I'm feeling lead toward being a stay-at-home mom, and we can't afford to stay in our house on one income. It is bittersweet, since we built our house together. There are so many memories here, from staying here for the first time on our wedding night to bringing home both of our children to this house. All the meals cooked and shared, the laughs, the cries, the prayers, the birthday parties, Christmas parties, and the list goes on. Pray that we can sell quickly and move onto the newest chapter in our lives!

Abby turned 2 years old on September 4, and started dance classes this year. She loves it! I was worried she would be too young, but she does so good!

We had a great summer swimming and riding our bikes together. Jeremy and I both got new bikes and bought a pull-behind trailer for the kids. They have fun sitting next to each other riding on the trails and around the neighborhood.
We also took a vacation to Hocking Hills, OH late June. We had a great time with Jeremy's family, where most of us stayed in a huge log cabin that we rented. So nice! Jason and Julie stayed in a nearby campground with their 6 kids. It was so nice to spend that time together! We made a day trip to the Columbus Zoo, which the kids loved!
Jeremy's youngest brother, Jonathan, and his wife, Kelly, got married July 9th. A beautiful wedding in Holland on a scorching hot day! At least it didn't rain! Welcome to our family, Kelly! We are so blessed to call you a sister now!

A more sad event was the passing of my grandmother, Rosemary Zaskiewicz. She was 85 and had been in poor health the past few years. In and out of the hospital on a regular basis, we all knew she wouldn't live much longer. On September 27th, she passed peacefully at St. Mary's Hospital after a lethal diagnosis of pneumonia. It gives me peace to know that she is in a better place and no longer suffering.
We recently put our house on the market for sale, as well. I'm feeling lead toward being a stay-at-home mom, and we can't afford to stay in our house on one income. It is bittersweet, since we built our house together. There are so many memories here, from staying here for the first time on our wedding night to bringing home both of our children to this house. All the meals cooked and shared, the laughs, the cries, the prayers, the birthday parties, Christmas parties, and the list goes on. Pray that we can sell quickly and move onto the newest chapter in our lives!
Sunday, May 15, 2011
A Dedication and Mama Returns!
Tonight, Jeremy and I dedicated our son, Evan, to the Lord at the evening church service. We did Abby as a baby, too. Evan blesses us everyday with his smiles and gentle spirit, and we can't wait to raise him to know our Savior, Jesus Christ! And how awesome it was to feel the Holy Spirit within us as the congregation prayed over us! May the Lord continue to bless us and guide us as we raise our children according to His word. After the service, we had everyone over for pizza and cake. Fun for us and all the kids loved playing with their cousins, aunts, uncles, and grandparents! Thanks, everyone, for your love, support, and prayers!
 Can't seem to get a good shot of Abby cooperating for the camera :(
 But she loves her cousin, Ruby!


On another note, we witnessed the mama rabbit returning to nurse her baby bunnies (see previous post)! Yay! We were even able to catch a quick snap shot.


On another note, we witnessed the mama rabbit returning to nurse her baby bunnies (see previous post)! Yay! We were even able to catch a quick snap shot.

Wednesday, May 11, 2011
Finder's Keepers?
Look what Minnie, our miniature dachshund, found the other day while playing outside - a little nest of baby bunnies in a hole in our yard! Of course, Minnie tried to kill them, so I hope she didn't hurt them too badly! :( I didn't think we would ever have something like that in our backyard. We don't exactly have a lot of trees or nature around our neighborhood. They are so cute and tiny that I just want to keep all of them! I don't know exactly how many are in there, but I think there are at least 8 of them. For some reason, I can't help myself from being VERY concerned about these little babies. I'm sure I should just leave them alone, but I've gone out every day since we've found them to make sure they are still alive. I guess it's just my motherly instincts - it apparently applies to animals, too! Today, we think we saw the mama bunny in the distance a few houses down by the neighbor's pine trees. It's good to know that she's watching out for her babies and makes me not so worried. I mean, it's not like rabbits haven't mated before, right?!? I'll admit, sometimes I can be a little ridiculous . . . . but I'm a mom, so I'm allowed :)


Saturday, April 23, 2011
Precious Moments
My daughter, Abigail - Abby, as we frequently call her, is probably one of the sweetest, most gentle, loving, smartest, and spunkiest 19 month olds I've ever met. And I'm not just saying this because she is my daughter (although it may play a small part), but because she amazes me more and more each day. From an early age (around 3 months), I started to use sign language with her so she could communicate. I taught her "milk", "more", and "please", which she still uses to this day, even though she can say those words now (she just says and signs both together). Her current vocabulary just amazes me! She probably knows about 50 words, and pronounces them fairly well. She's always seemed to be a fast learner and catches on very quickly. Recently, she's been saying, "please" and "thank you, Mama" - all on her own! She's just becoming such a polite little girl!
Jeremy and I try our hardest each day to show Abby how much we love her. But more importantly, we want her to know how much Jesus loves her. Every opportunity we get, we try to teach her about God and Jesus and what His word says. We have a children's bible that she loves to read as well as many movies based on the bible. At each meal before we eat, we pray together. When we ask her if she's ready to pray, she grabs both of our hands and closes her eyes. So cute! She also does this before nap time or bedtime. And she won't let you forget to pray!
Yesterday, while driving in the car, I had my I-pod playing Shawn McDonald's "Take My Hand". Love this song! If you've never heard it, look it up sometime. I just love the lyrics and the beat and the way it makes me feel when I listen to it. A couple months ago, as we were in the car, Abby started complaining and crying about something, so in an effort to redirect and distract, I turned this song on and we "praised Jesus" together. There's a part in the song where the lyrics are "na-na-na-na-na-na-na-na-naaaaahh, I need You!" and it repeats a couple times. During this part, I had my hand in the air waving it back and forth "praising Jesus". Abby had fun copying me, and soon quit complaining about whatever it was she wasn't happy about. Well, yesterday, I had this song playing again, and heard Abby in the backseat doing something. I look back, and she has her hand in the air waving it to the song singing "na-na" with the beat! My heart just melted! I joined in with her, and soon Abby's baby doll was "praising Jesus" with us too! How awesome to see her love for the Lord, even though she may not understand everything fully at her age.
"Train up a child in the way he should go, even when he is old he will not depart from it." Proverbs 22:6. How reassuring and awesome God's promises are!

Friday, April 22, 2011
Tied up
I had this idea that I wanted to make Evan a tie to wear for his Easter outfit. I used some left over fabric from a previous project, and thought it would be easy to just stitch some fabric together, add some elastic to it, and voila! I'd have a cute, handmade, quick and easy tie! NOT! It ended up being nearly a four hour project! I blame my neurotic perfectionism. I started by researching a couple internet sites and watching a few tutorials online. Most of what I read and saw, though, was on how to turn a men's tie into a children's tie. Not what I necessarily wanted to do. So, I tried to make-up my own method.
The actual tie wasn't so hard. That only took me a few minutes to do. Stitch the edges of some fabric together, turn it inside out, create a "dimple" at the top, stitch it in place - done! The tricky part is the knot at the top. I was trying desperately to find a simple way to add the knot without any stitching showing or any seams. It actually looked pretty good, but being the perfectionist I am, I wanted to back of the tie (which nobody was going to really see) to be seam-less, too. I couldn't figure this one out! After re-doing the knot about four times, I was somewhat satisfied and finished the tie. Here it is:

Kind of cute, huh? I'm open for suggestions on how to do the knot . . .
Monday, April 18, 2011
Playhouse fun
The kids and I met with Aunt Julie and cousin Zaria today for a play date at DeAnna's Playhouse in Holland. For those of you who have never been there, it is like the treehouse at River Town Crossings Mall times, like, 20. We had only been once before, but both forgot our cameras that first time. There are so many things for the kids to play with and the kids love it! Among the many toys there, they have a pretend bank, construction site, store, house, a music room, an art room, a stage complete with dress up costumes, and a room especially for babies! They also have a designated area to eat your packed lunch with complimentary coffee, baggies with cheerios for the kiddos, and magazines. I made sure to bring the camera today to get a few quick snapshots.


Thanks, Julie and Zaria, for the fun morning!


Thanks, Julie and Zaria, for the fun morning!
Sew cute!
I've been having so much fun lately making children's clothes with my new sewing machine (thanks, Mom, for the great Christmas present!). I started off by making an apron, a few purses, a new diaper bag, and a couple diaper wipes cases. It is so much fun to pick out the pattern and look through all the fabric choices (I mainly shop at Field's Fabrics) - there are so many different colors and prints to choose from! I could spend hours there selecting just the perfect mix and match combo of fabrics for my "master piece". One must be very careful when selecting fabric, though, since it can become a little pricey. I try to pick at least one fabric for my project from the clearance section to lessen the cost, but I've been able to create a few projects using entirely clearance section fabric - SCORE! Although it takes forever to cut out all the patterns and fabric, it's so exciting once it starts coming together. I usually get all giddy toward the end of a project, and start working really fast to finish it. A couple times this has backfired, where I've accidentally stitched something on the wrong way. Then, of course, I have to undo everything I just did and redo it - ugh! Spazzy Perfectionist, just slow down!
So, after a few what I like to call "starter" projects, I thought I'd try my hand (no pun intended) at sewing some children's clothing. Since I have 7 nieces, I thought it would be fun to make dresses/shirts for them all. Here are a couple to start:


They turned out super cute, but the sizes are a little off from what the average child size should be, which has been a little tricky. It ends up making the neck really wide, so the first dress/shirt I did needed some altering to make it fit properly. I think once I get the kinks worked out, they will be perfect! And they are, surprisingly, simple to make - bonus!
My next project was a request from my sister-in-law. She's in love with these ruffle pants, so I made her daughter a pair of pants that match her dress/shirt (from the first picture). I just finished them last night, and was so excited about how they turned out! Adorable!

Once I get a little more practice, I think I might be able to sell some projects online! Hopefully, people will want to buy them? (hint, hint :] )
Monday, April 11, 2011
The next step
Something that God had really been laying on my heart recently was that He wanted me to be baptized. I had not been baptized since being saved in 2007. Jeremy brought it up sometime last year, and I really didn't feel the need to do it then, but thought I'd pray about it and give it some thought. I had been starting to think more about it the past few months, then had a dream about a month ago where I was getting baptized. I thought, "OK, God, I hear you. I'll get baptized." Honestly, it wasn't something that I particularly wanted to do - you know, me on display in the front of the church, being completely submerged in a pool of water, getting soaking wet. I don't like to be the center of attention, and certainly didn't want to be wet while doing it! But, one must follow the call of God. If this was the next step He wanted me to take, then I shouldn't question it.
So, I made the decision to get baptized, and did so last night. I was so nervous! I was with a group of about 40 others. The ceremony was at Resurrection Life Church, the church I attend with my husband and kids. The baptism pool is situated upstairs, behind a wall with a picture-window "peephole" to allow everyone to see you. We were ushered up the stairs, given baptismal robes, and lined up to take our turn. Once in the pool, we were asked if we wanted to say anything. I adamantly did NOT want to say anything. I was nervous enough, I didn't want to have to talk, too! But, once again, the Holy Spirit inside me insisted that I say something. I felt like He was telling me to say I was thankful for my amazing husband, kids, and my family (who were all present for the ceremony - thank you, everyone!). I thought, "Really? I am thankful, but they already know that. Do I have to say it out loud?? To EVERYONE here?" "Yes, you do," He replied. "OK. Fine, Lord. I'll say it." So, at the last minute, I pushed my shoulders back, lifted my head up, and proudly told the whole congregation (in a quivering voice, of course), how thankful I was for the family He blessed me with. Whew! That wasn't so hard! Then, they asked me to state out loud who my savior was. "Jesus Christ," I replied. And then, in the name of the Father, Son, and Holy Spirit, I was completely submerged into the pool and resurrected filled with the gift of the Holy Spirit! Amazing!
After the baptism, we were told to change into our regular clothes, and were ushered into a prayer room where they had their "prayer warriors" ready to pray with us. All in all, what a wonderful experience. So glad I had the opportunity, and the change in heart, to get baptized. God knows what He's talking about, and someday I'll learn not to question Him and JUST DO IT!


Friday, April 8, 2011
It's a start

Thankfully, we made it through and decided we still wanted to get married - lol! We were married December 6, 2008 in a winter wonderland :) I prayed so hard the weeks before the wedding for there to be soft, fairytale-like snow falling, and that is exactly what God gave us! It was absolutely beautiful!
Soon after the wedding, we were blessed to find out we were pregnant with our daughter, Abigail. She was born September 4, 2009. Not long after she was born (I think she was 8 months), we found out we were going to have another addition to our family! Evan was born January 19, 2011.
What a whirlwind of the past couple of years! I can say, though, that they have been the best 3 years of my life! I believe that God has brought Jeremy and I together for great purposes, and by relying solely on His ultimate timing and wisdom, we have been blessed beyond measure!


Subscribe to:
Posts (Atom)